
ℹ️ INFERENCE DEFEND
Custom scanners are only available in our Inference Defend product.
ℹ️ PREREQUISITES
Make sure you have the required permissions to create scanners.
In addition to the scanners provided with CalypsoAI, you can also create and configure your own custom scanners, tailored to your specific use cases and business needs.
💡 WORKING WITH SCANNERS
The procedures in this section describe only the basics of creating a custom scanner.
Learn more about working with scanner versions, publishing, and editing
You can create the following three types of custom scanners:
GenAI scanners
GenAI scanners use natural language instructions to intelligently block or flag unauthorized content by understanding both the intent of the scanner and the content of the prompt or response.
To create a custom GenAI scanner:
- Log in to CalypsoAI.
- From the menu, in the Configuration section, select Playground.
- Select Build a custom scanner > GenAI scanner.
The GenAI scanner window is displayed.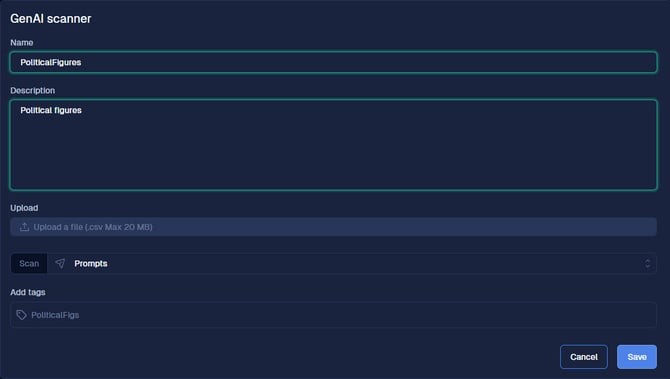
- In Name, enter a name for your scanner.
- In Description, enter the input for which you want the scanner to scan.
OR
Select Upload a file, and upload a CSV file with your input. - From the Scan list, select the direction of the scan.
You can choose from the following options:
- Prompts: only the prompt is scanned.
- Responses: only the LLM response is scanned.
- Prompts & Responses: both the prompt and response are scanned.
- In Add tags, enter a tag for your scanner, and press Enter.
ℹ️Tags are optional, and you can enter more than one tag. - Select Save.
The Save new version window is displayed. - In Version, enter a name for your scanner version.
- In What’s new (optional), enter a summary of the changes introduced in this version.
- Select Save version.
Your custom GenAI scanner is saved, and you can find it in the Playground tab, at the top of the Custom scanners list.
Regex scanners
Regex scanners use regular expressions to scan text, and block, flag, or redact content based on a regex pattern you can configure.
To create a custom regex scanner:
- Log in to CalypsoAI.
- From the menu, in the Configuration section, select Playground.
- Select Build a custom scanner > Regex scanner.
The Regex scanner window is displayed.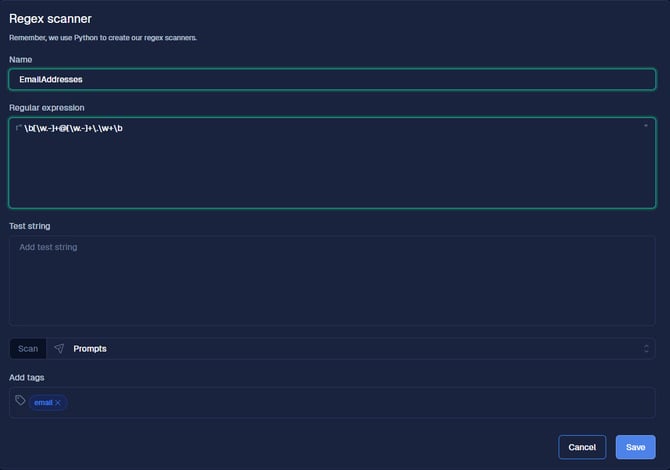
- In Name, enter a name for your scanner.
- In Regular expression, enter your regular expression.
- In Test string, to make sure your regular expression is functioning correctly, enter a value to test.
- From the Scan list, select the direction of the scan.
You can choose from the following options:
- Prompts: only the prompt is scanned.
- Responses: only the LLM response is scanned.
- Prompts & Responses: both the prompt and response are scanned.
- In Add tags, enter a tag for your scanner, and press Enter.
ℹ️Tags are optional, and you can enter more than one tag. - Select Save.
The Save new version window is displayed. - In Version, enter a name for your scanner version.
- In What’s new (optional), enter a summary of the changes introduced in this version.
- Select Save version.
Your custom regex scanner is saved, and you can find it in the Playground tab, at the top of the Custom scanners list.
Keyword scanners
Keyword scanners scan text, and block, flag, or redact any content that contains specific keywords you can configure.
For an end-to-end tutorial on creating a keyword scanner for a specific use case, see Creating a custom keyword scanner.
To create a custom keyword scanner:
- Log in to CalypsoAI.
- From the menu, in the Configuration section, select Playground.
- Select Build a custom scanner > Keyword scanner.
The Keyword scanner window is displayed.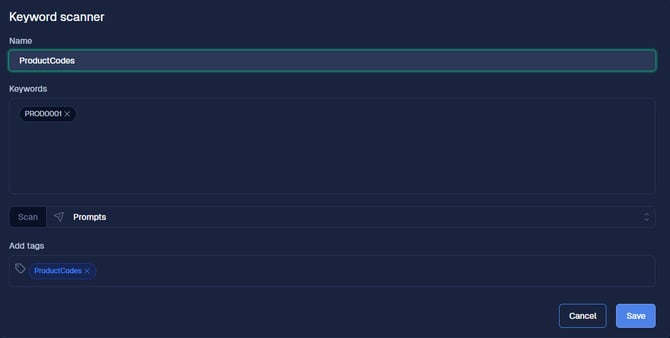
- In Name, enter a name for your scanner.
- In Keywords, enter the keyword for which you want the scanner to scan, and press Enter.
You can enter more than one keyword. - From the Scan list, select the direction of the scan.
You can choose from the following options:
- Prompts: only the prompt is scanned.
- Responses: only the LLM response is scanned.
- Prompts & Responses: both the prompt and response are scanned.
- In Add tags, enter a tag for your scanner, and press Enter.
ℹ️Tags are optional, and you can enter more than one tag. - Select Save.
The Save new version window is displayed. - In Version, enter a name for your scanner version.
- In What’s new (optional), enter a summary of the changes introduced in this version.
- Select Save version.
Your custom keyword scanner is saved, and you can find it in the Playground tab, at the top of the Custom scanners list.